1972 Ford F100 Ignition Switch Wiring Diagram
We don't know about you, but one of the scariest things to us (well it used to be scary before this story) was installing a custom wiring harness in a project vehicle. While building our Project F-Word 1969 Ford pickup, we bit the bullet and knew that's exactly what we'd need to do. The old wiring harness was indeed intact and (mostly) worked, but after all those years and God knows how many owners, the stock wiring was filled with twist ties, wire nuts, worn and cracked connectors and wires, and just general abuse that comes from age and people trying to add various electrical goodies.
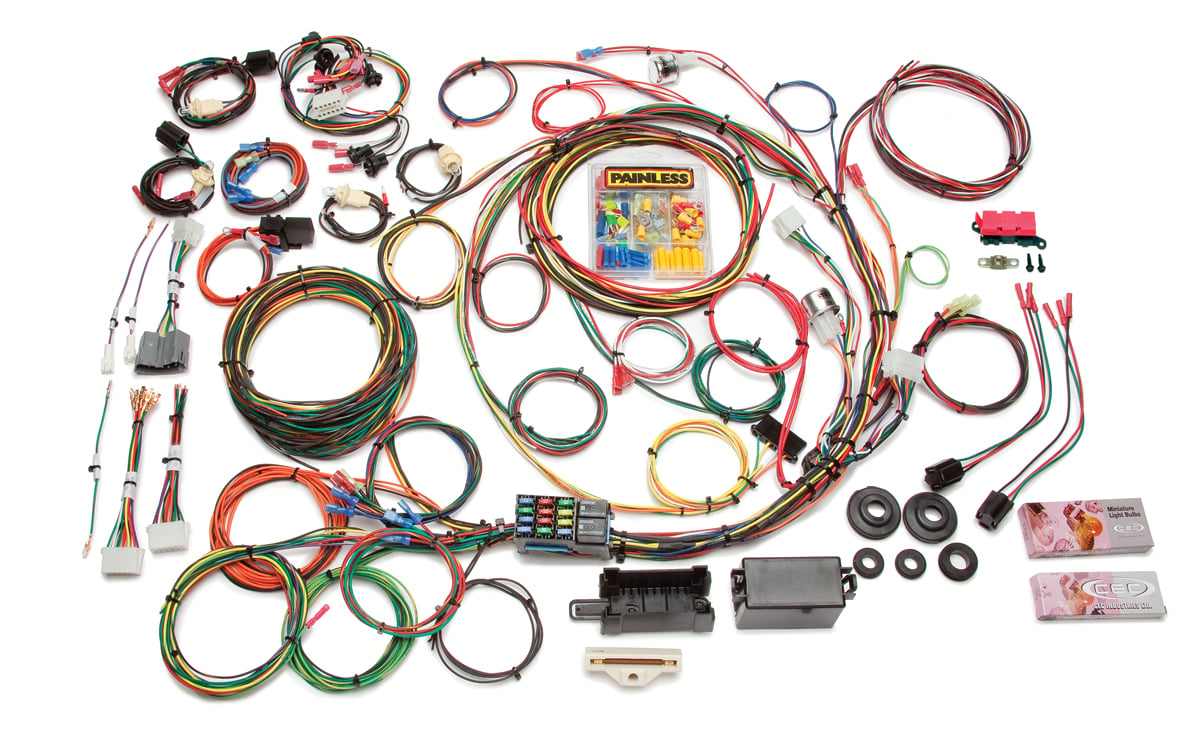
This is the Painless Performance 21-circuit direct fit 1967-1977 Ford F-Series Ford truck harness, part no. 10117.
Custom Cluster And Wiring
We went to our friends at Painless Performance for a brand-new wiring harness and Andrews Tuning & Performance for a custom Dakota Digital dash cluster . The Painless Performance 21-circuit direct fit 1967-1977 Ford F-Series Ford truck harness is the perfect upgrade, especially when you compare it to the old factory harness. Painless' harness uses many of the factory connections that are already pre-terminated. Also featured is its unique covered micro-fuse block with a 20-amp auxiliary relay circuit for accessories such as fog lights, electric fuel pump, or whatever you feel like adding in. Each wire is custom printed with the circuit identification as well as using Ford color codes for easy installation. They also offer part number 10118, which includes all brand-new headlight, ignition, dimmer, wiper, and brake switches.
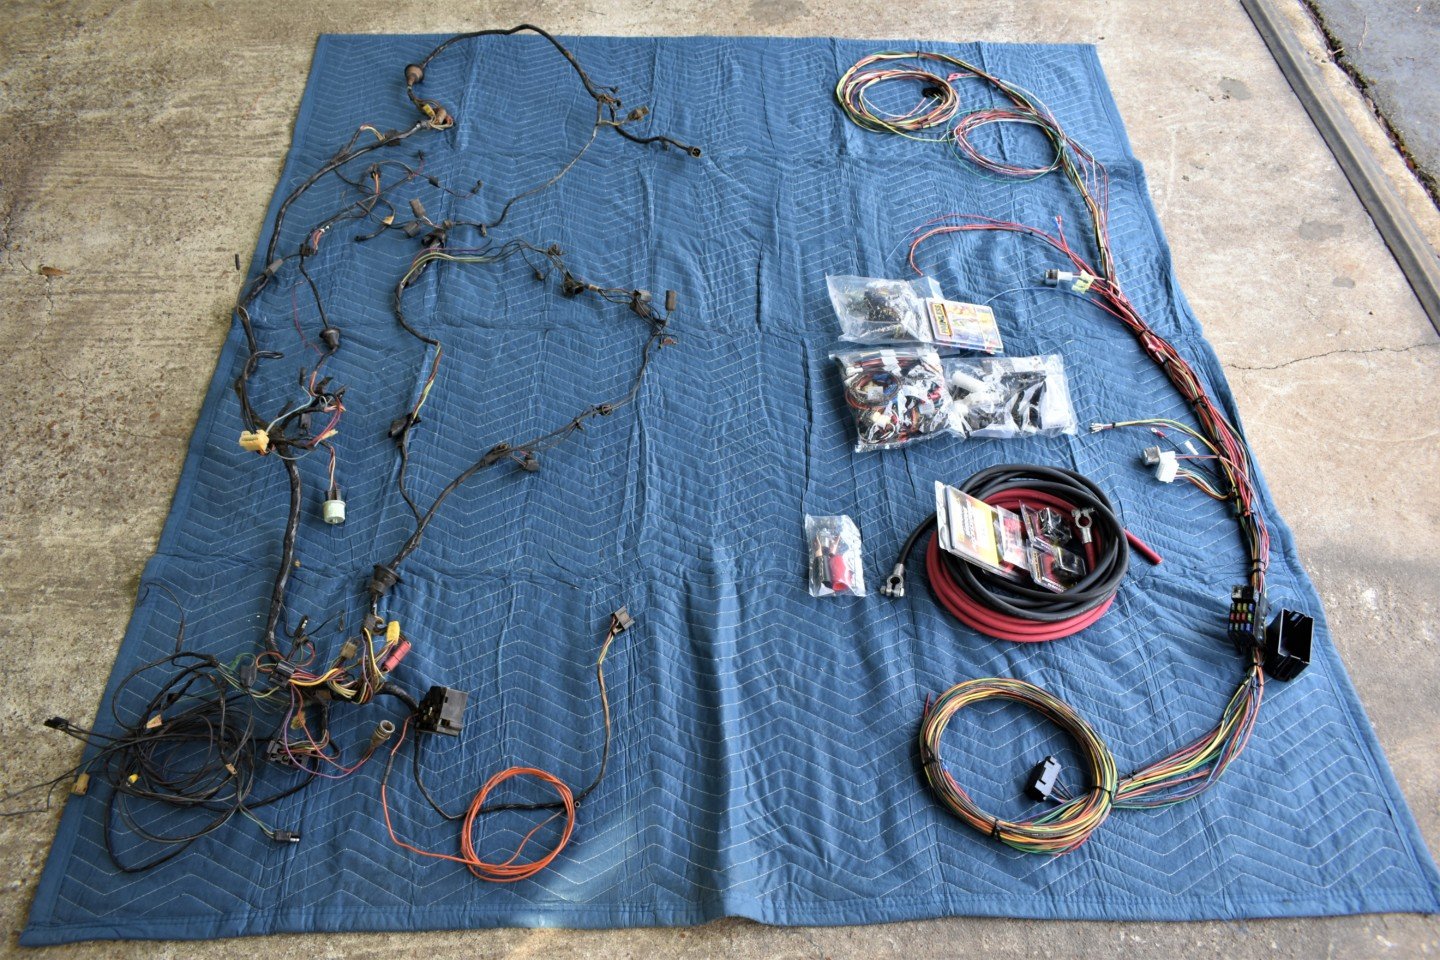
Comparing the new Painless harness to the original stock harness revealed how much we were going to improve our truck's wiring.
We also got one of Painless' harnesses for the rear-mounted battery that we were going to use, for weight distribution issues and to clean up the engine compartment (that Coyote is wiiiiide). Part number 40105 uses two 16-foot black and red cables that are 1-gauge (almost welding cables), which allows for them to be attached to the engine for maximum starting current and helps prevent voltage drop to the engine. It also eliminates the need for heavy cable connections between the engine and frame and includes side post adapters and high-amp crimp ring terminals with heat-shrink.
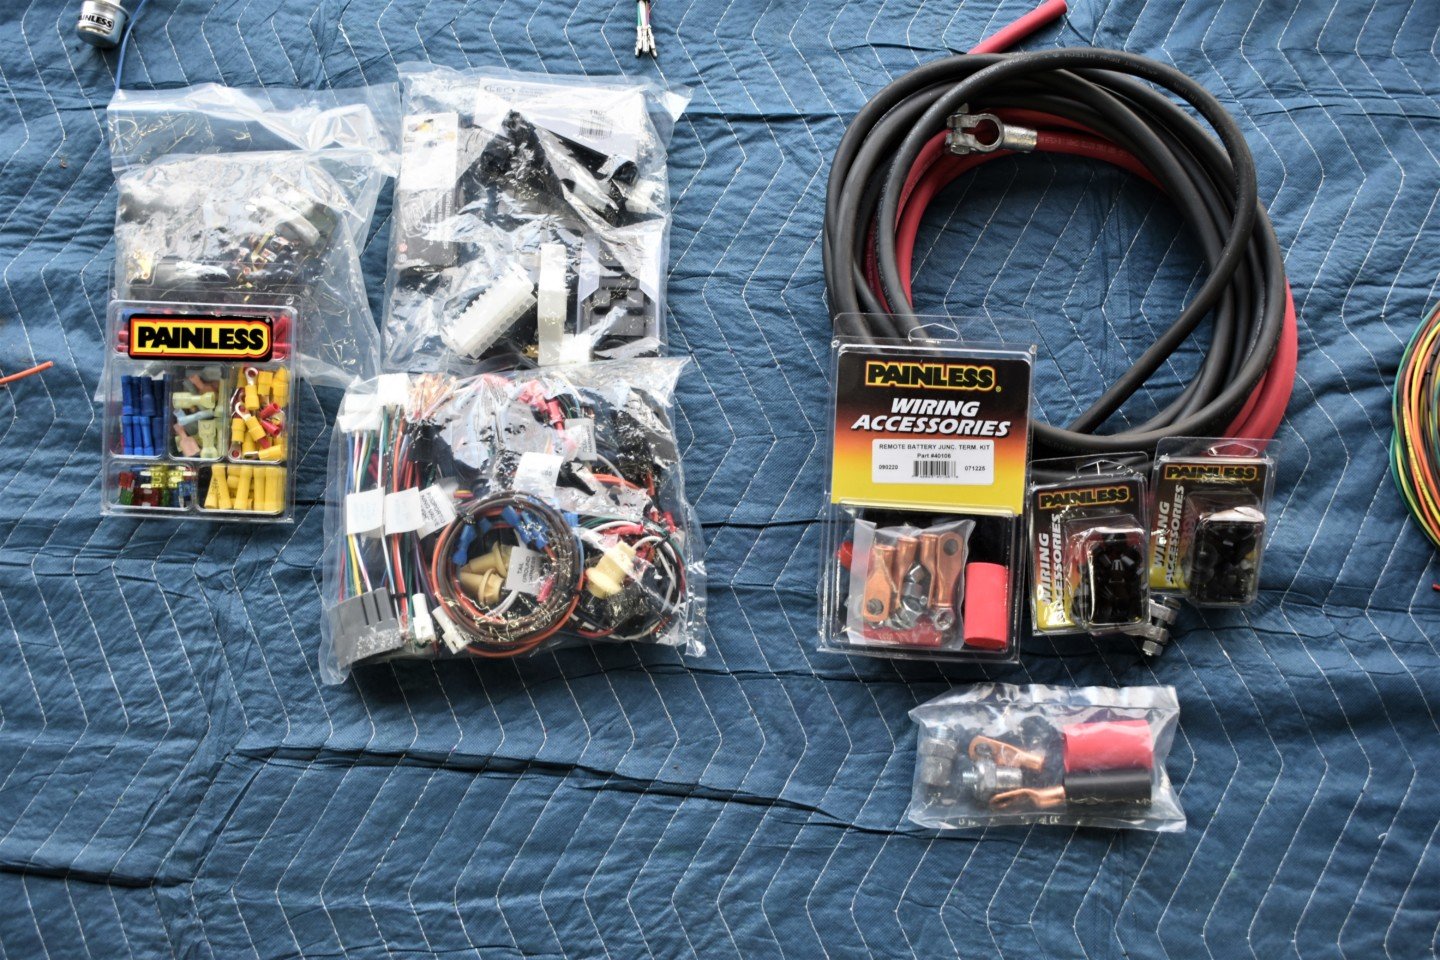
This is a look at the Painless battery relocation kit, Part number 40105. We moved the battery out of the engine compartment for several reasons—to change the weight distribution characteristics and also to clear some room under the hood.
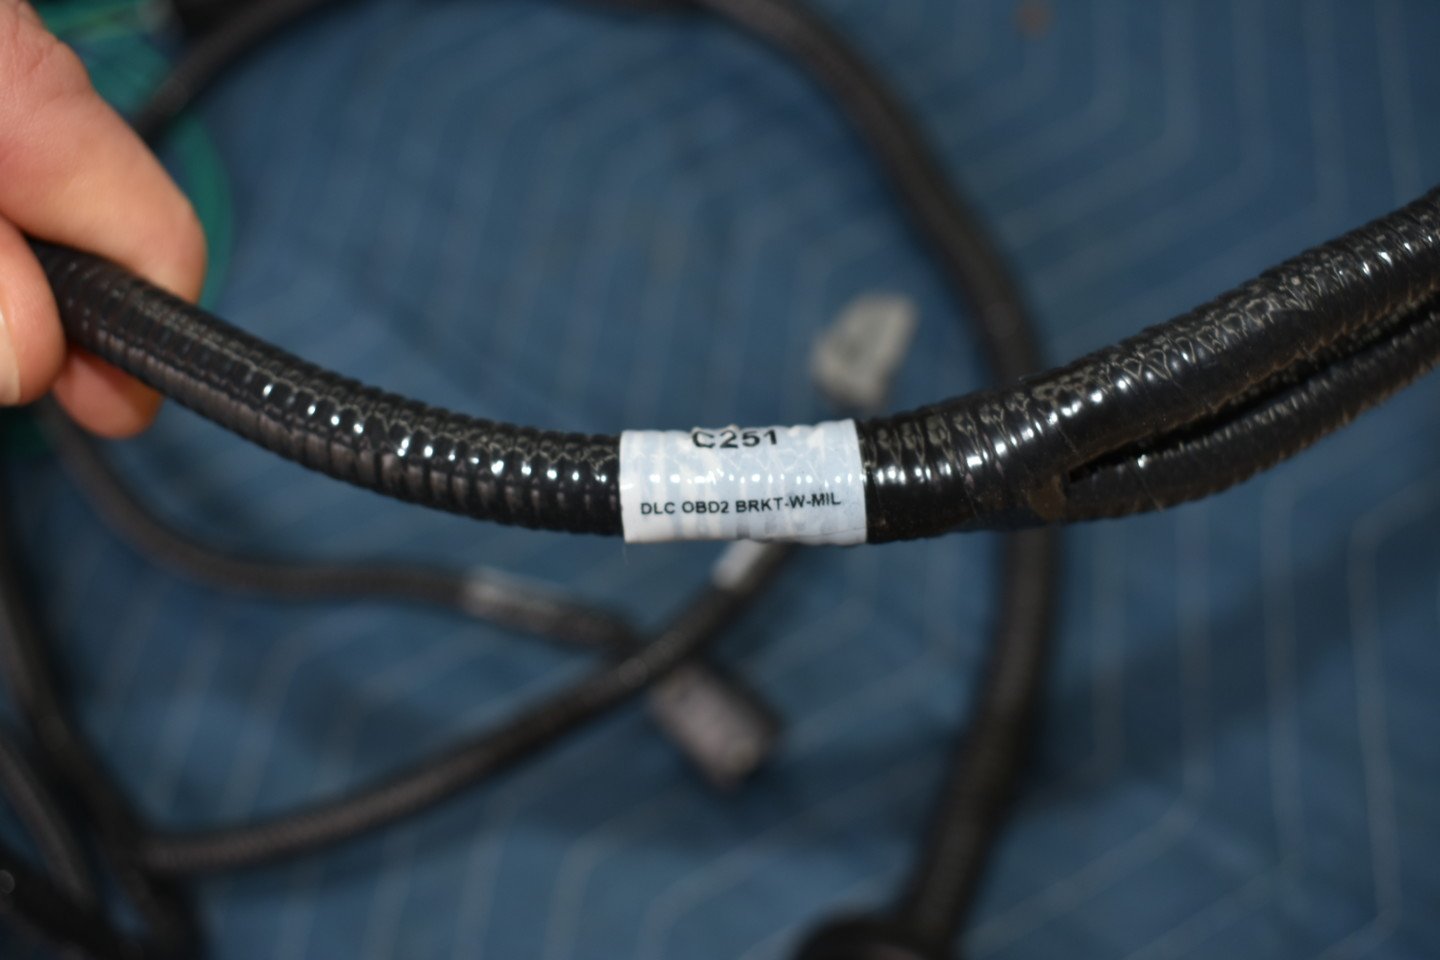
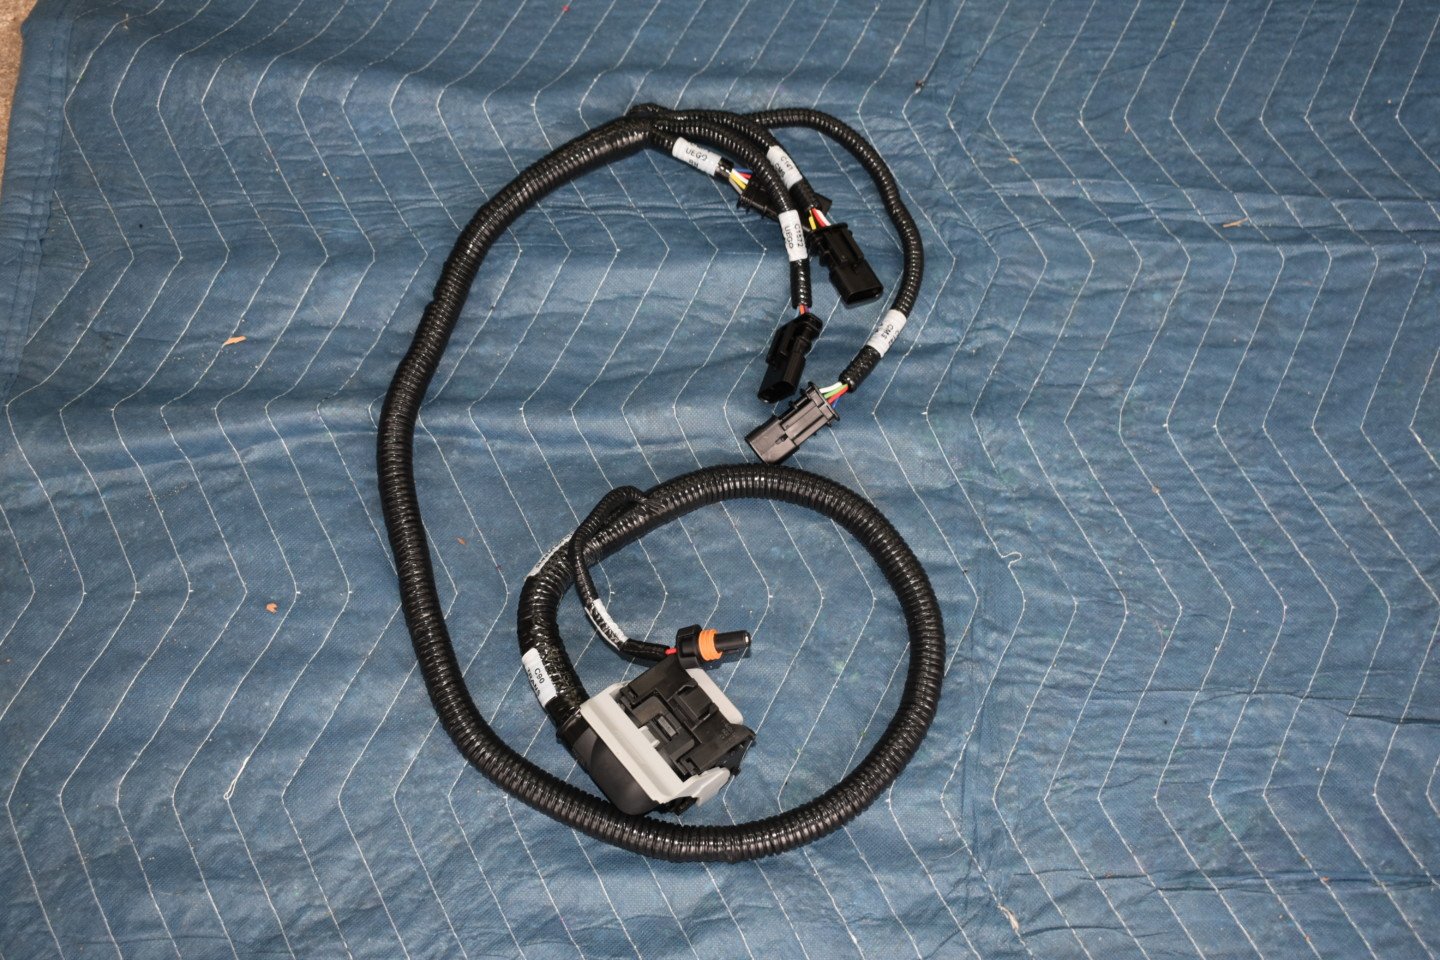
One of the things that we appreciate most about the Painless harness kit is that everything is labeled nicely. This shot is actually the Ford Control Pack harness, which employs similar methods.
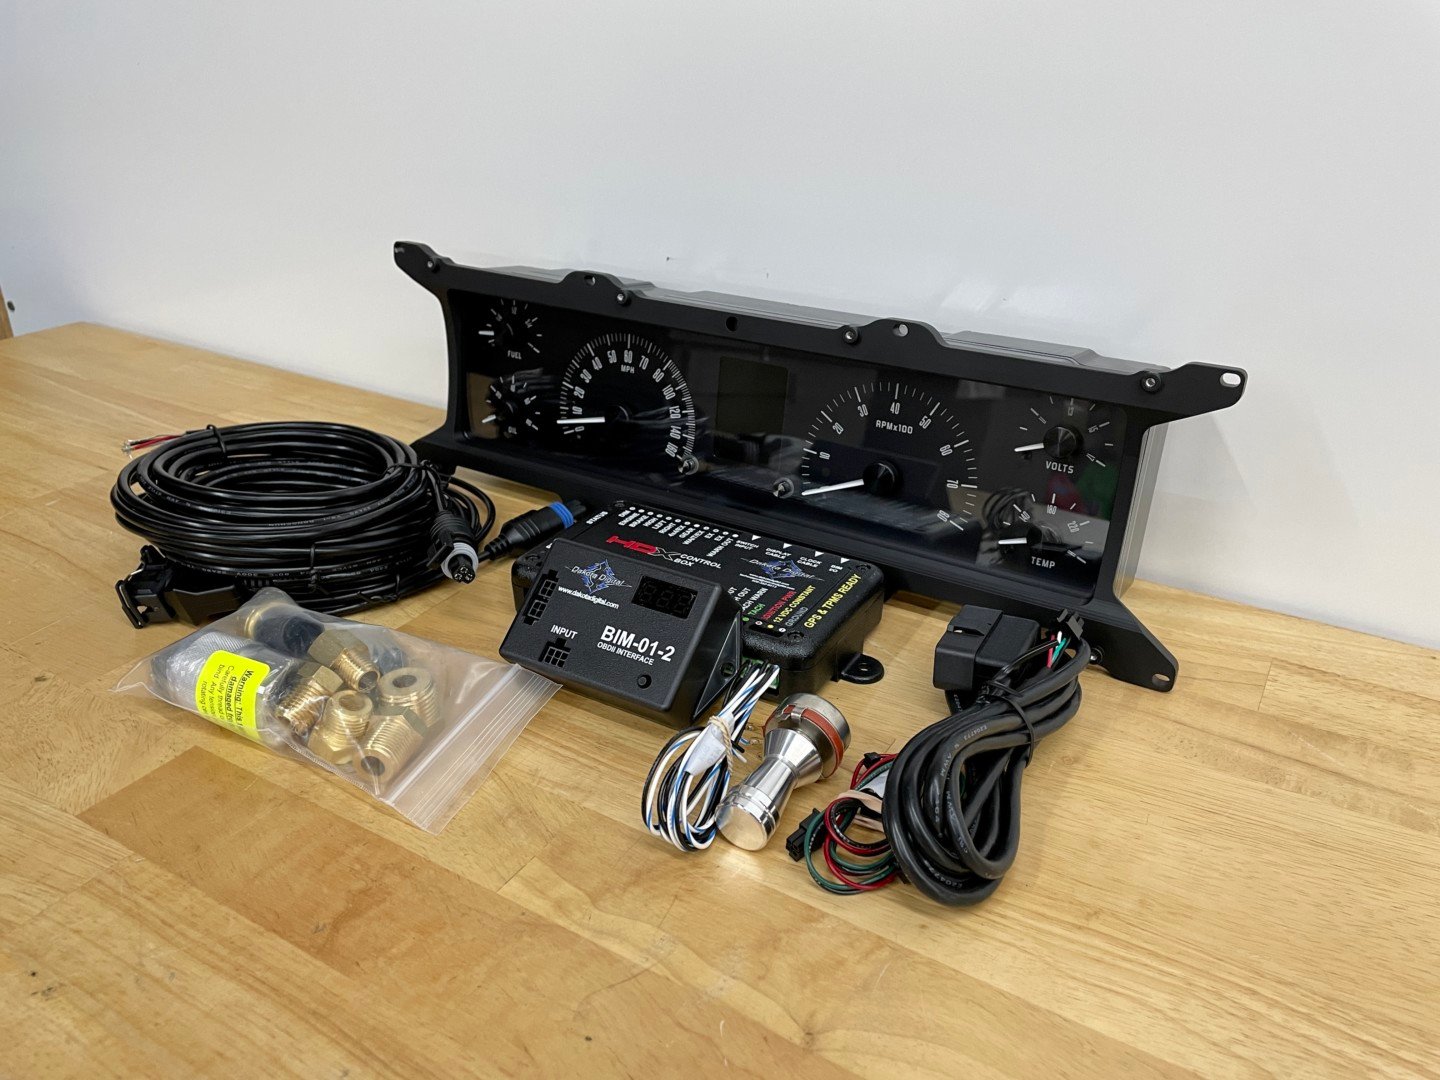
The Andrews gauges are a combination of Andrews and Dakota Digital working together to design a custom gauge cluster—based on Dakota Digital's standard cluster—that they build to the customer's wishes. It's a service that Dakota Digital offers, and Andrews has this very cluster as a part number that you can buy. It looks really cool, take a look at the instrument cluster here .
The Details
This cluster has all the awesome features that are offered in the Dakota Digital HDX series gauges and use the Dakota Digital OBD2 module. The cluster can pull all the data from the Ford Control Pack without any additional wiring. RPM, oil pressure, voltage, engine temp are all pulled without any wire. See it here . Basically, we eliminated those wires from the Painless harness and ran our own wiring for the speedometer and fuel level per Dakota Digital's schematic.
Using the Ford Control Pack with our crate motor, we didn't have to use the Painless wiring for the alternator and engine harness, so we used heat shrink to seal those wires.
With those parts and a few subtle changes to adapt them to our project truck, wiring it all was shockingly simple, and actually turned out to be kinda fun. What caused stress-inducing nightmares and cold sweats during the night turned out to be a worry about nothing. It all went together surprisingly simple and took less than a full day to finish. We're actually kind of looking forward to doing it again someday. Not tomorrow, but someday! So, let's look into what it took and how we wired this truck.
This shows us installing the fuse box mount, which we put behind the dash for easy fuse replacement.
Once the fuse box was mounted, we began routing the different sections of harness to their designated areas.
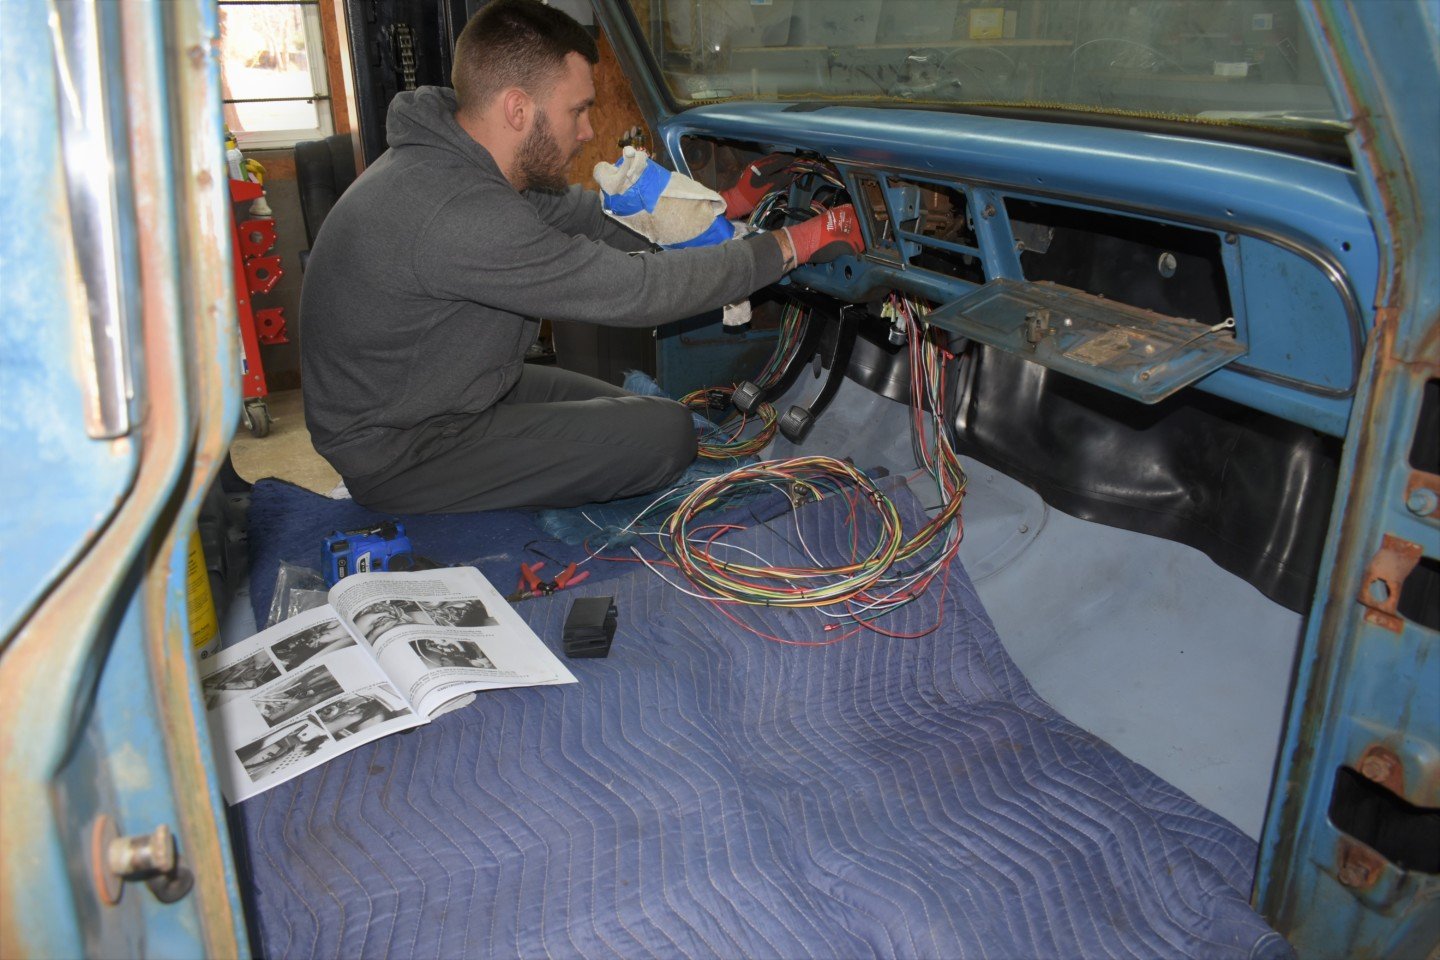
Routing the different sections of the harness to the designated areas took some time, but we purposely went slow to ensure that everything fit in an organized layout.
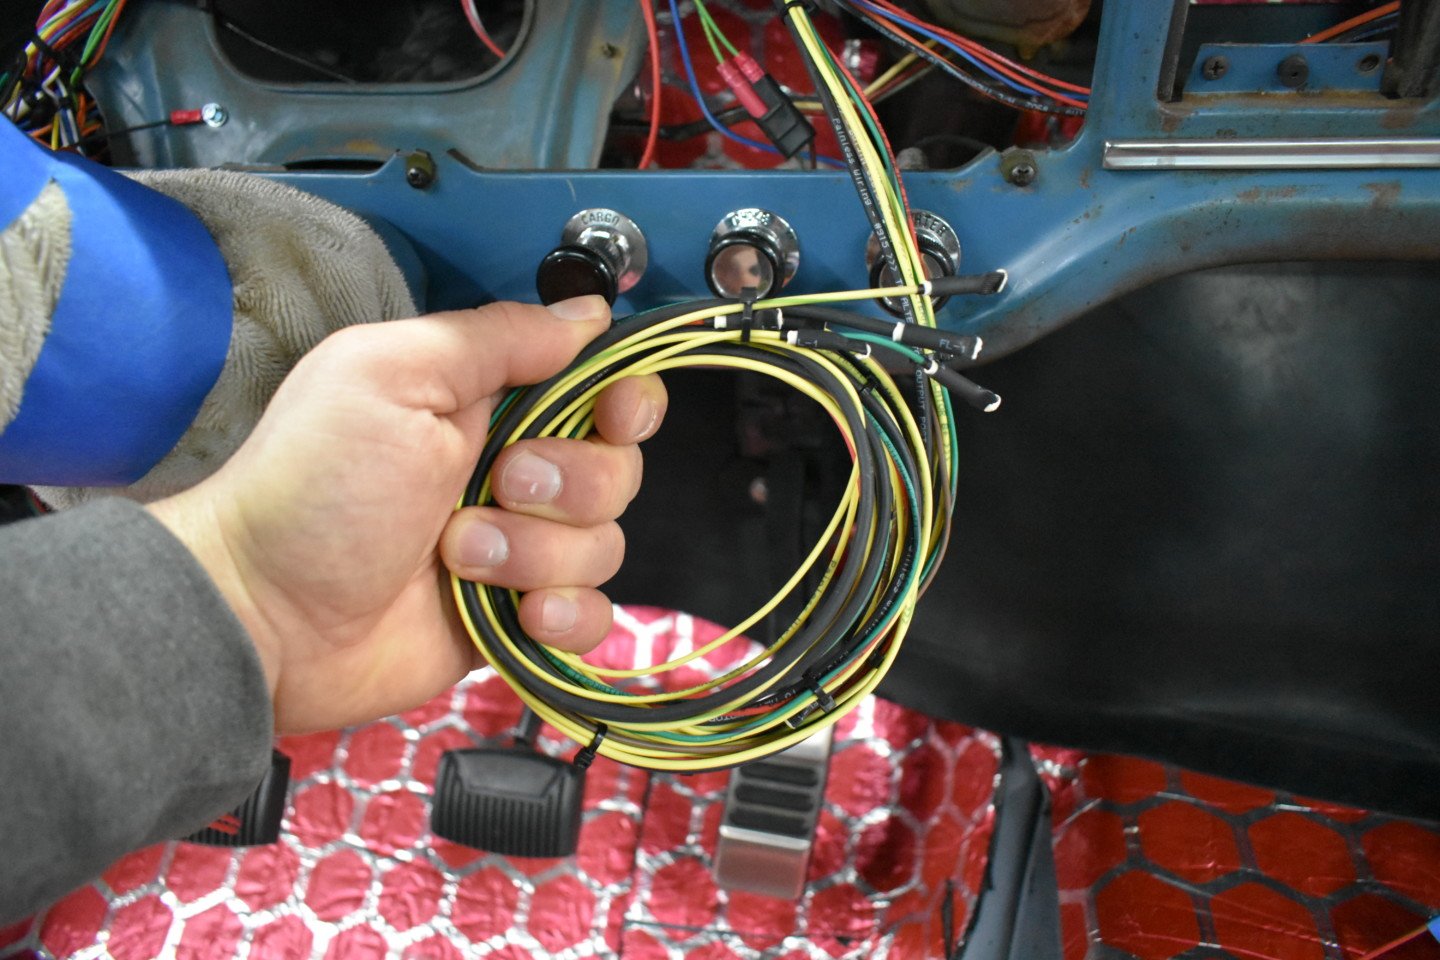
We were using an ididit steering column and it came with a new plug, so we hooked that into the appropriate part of the harness. Painless pre-installed the connectors for the ignition switch and we just had to plug them in according to Painless's instructions guidelines.
The same process was repeated on the ignition switch—the connectors we pre-installed so we just plugged them in, again according to the instructions. There is a grommet for the driver's side firewall hole where the headlights, horn, and bed harness pass through.
We used Painless' Classic Braid to shield the headlight and horn harnesses and secured them to the inner fender. Here we are installing and zip tying the bed harness to the back of the truck.
We took time to properly route and bundle the bed harness to make it as neat as possible. Once again, we installed Classic Braid on the bed harness to route it to the rear.
Same drill on the headlight and horn harness: use Classic Braid to cover the wires for a more professional and clean appearance and secure to the inner fender. You can see the finished headlight harness in the second photo.
We made the connections for the wiper motor and used the OE connector for the motor (Left Image). For the wires we didn't use in the Painless harness, we used an adhesive-backed heat-shrink to seal them off (Middle). We pulled the driver's side headlight and horn harness, and also the complete bed harness, through the firewall/grommet (Right).
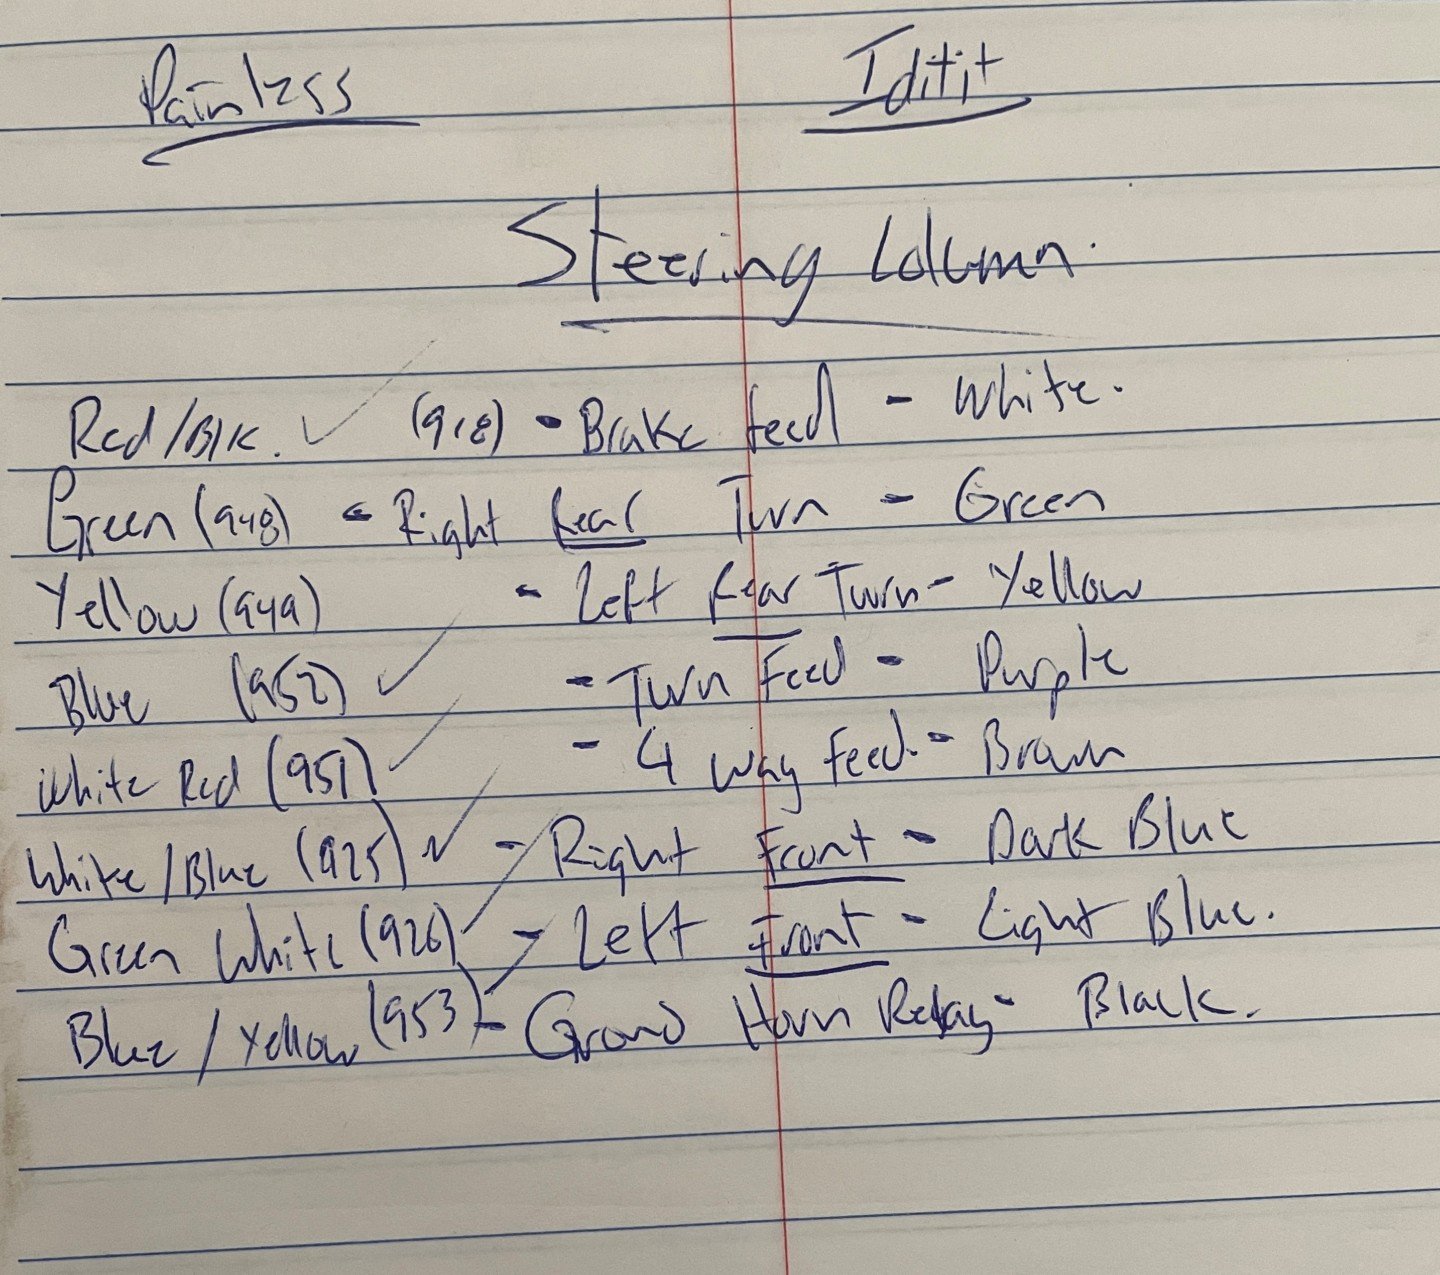
This is the wiring schematic for the ididit column, provided by ididit.
We used the provided connectors to finish the headlight harness.
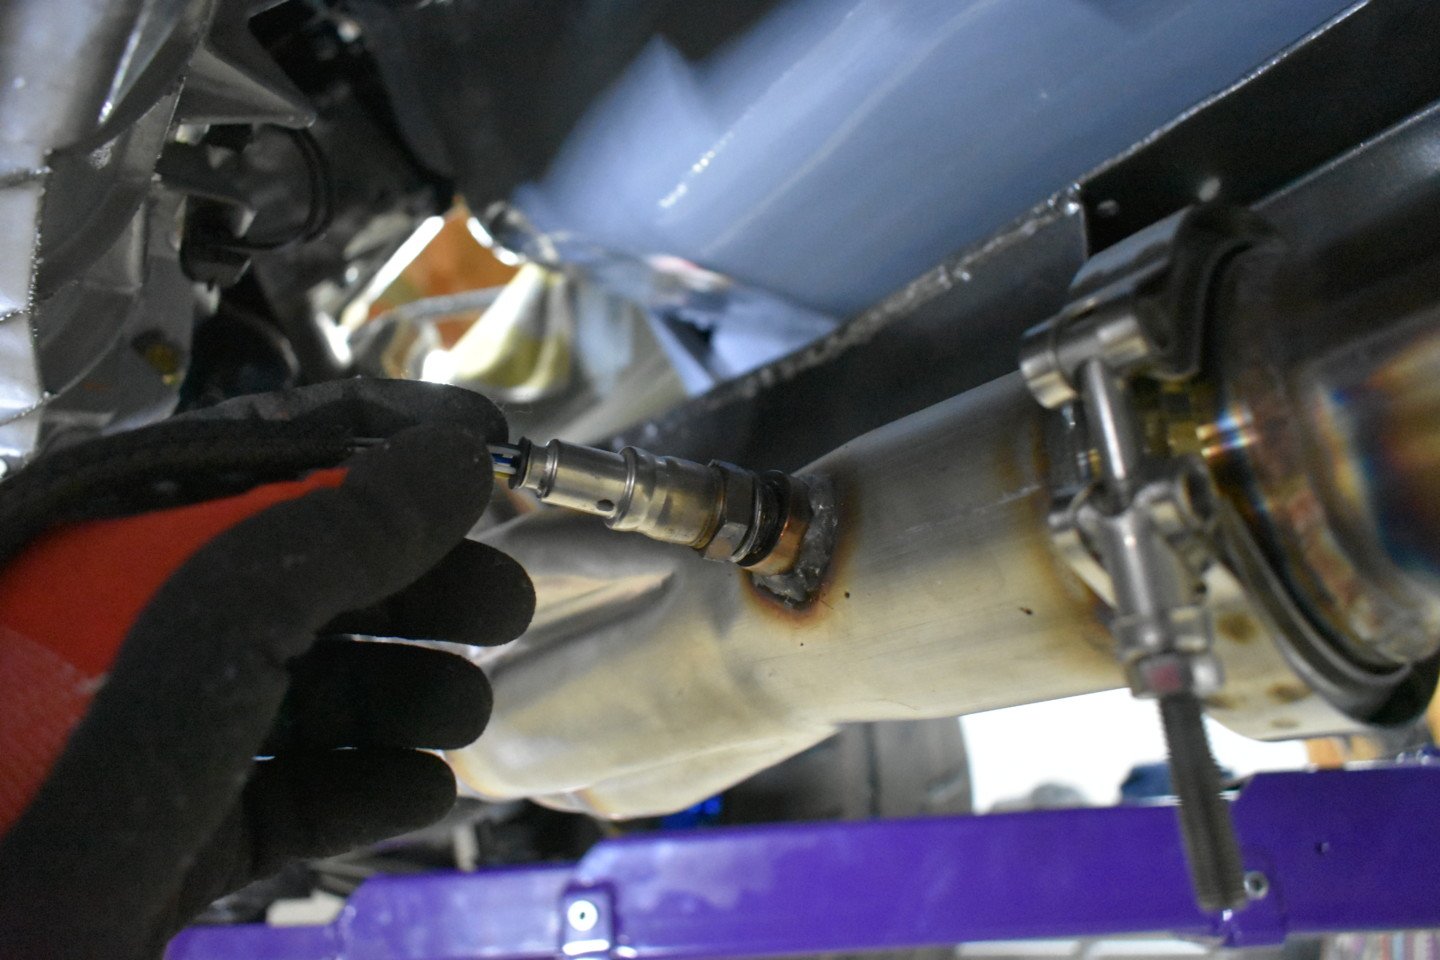
To help control the engine, we had to install the oxygen sensors that come in the kit.
This is part of the Ford Control Pack harness for the oxygen sensors and manual transmission.
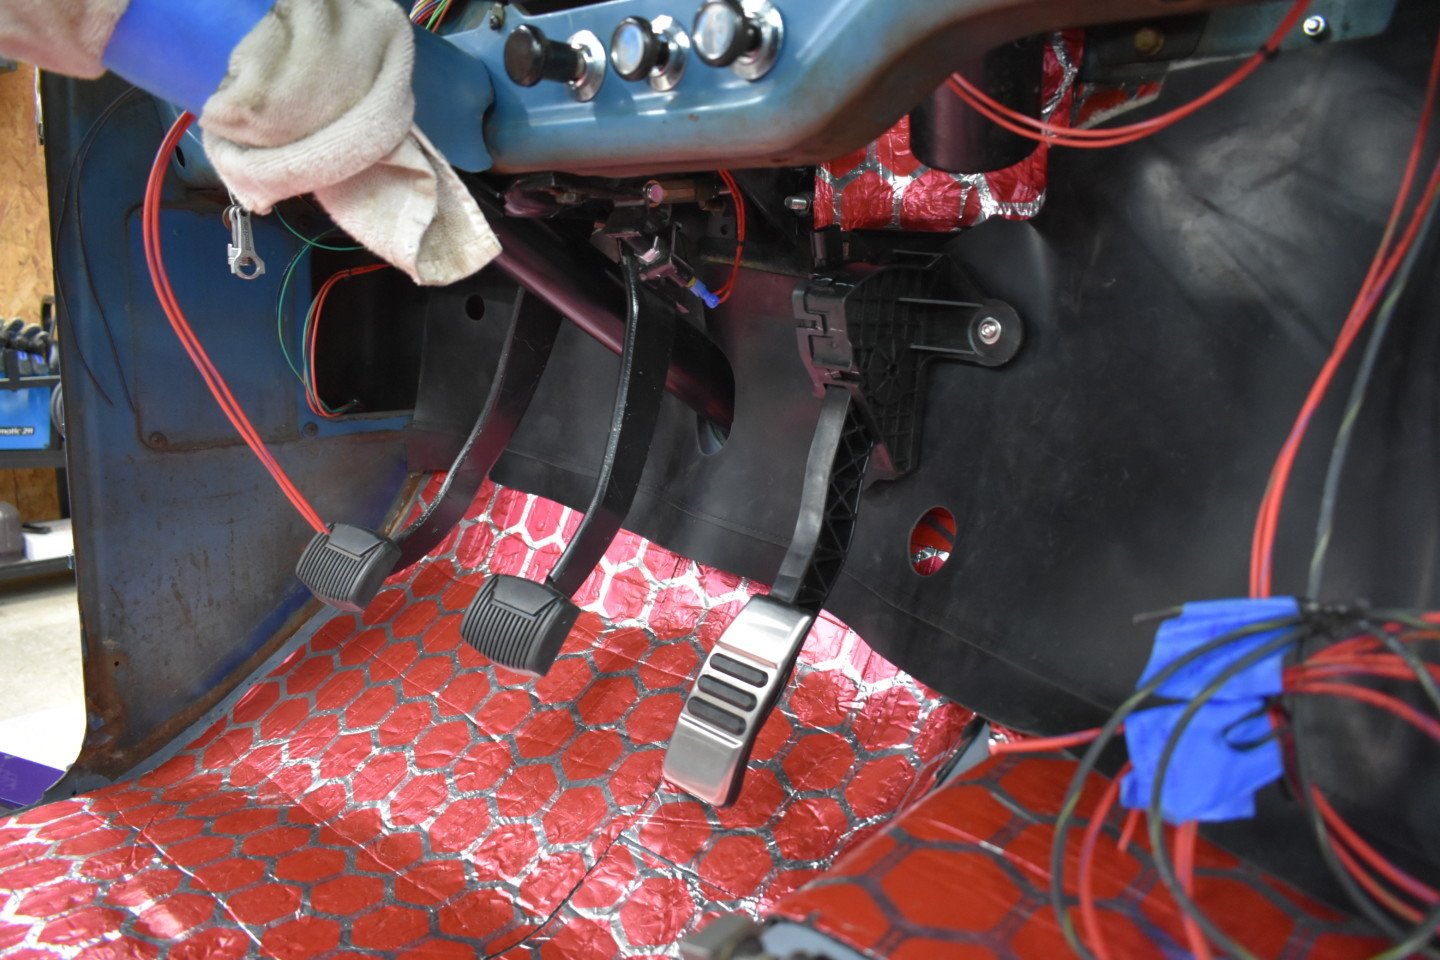
Running a modern EFI engine requires a drive-by-wire throttle pedal, so we took some time to mount it to the firewall.
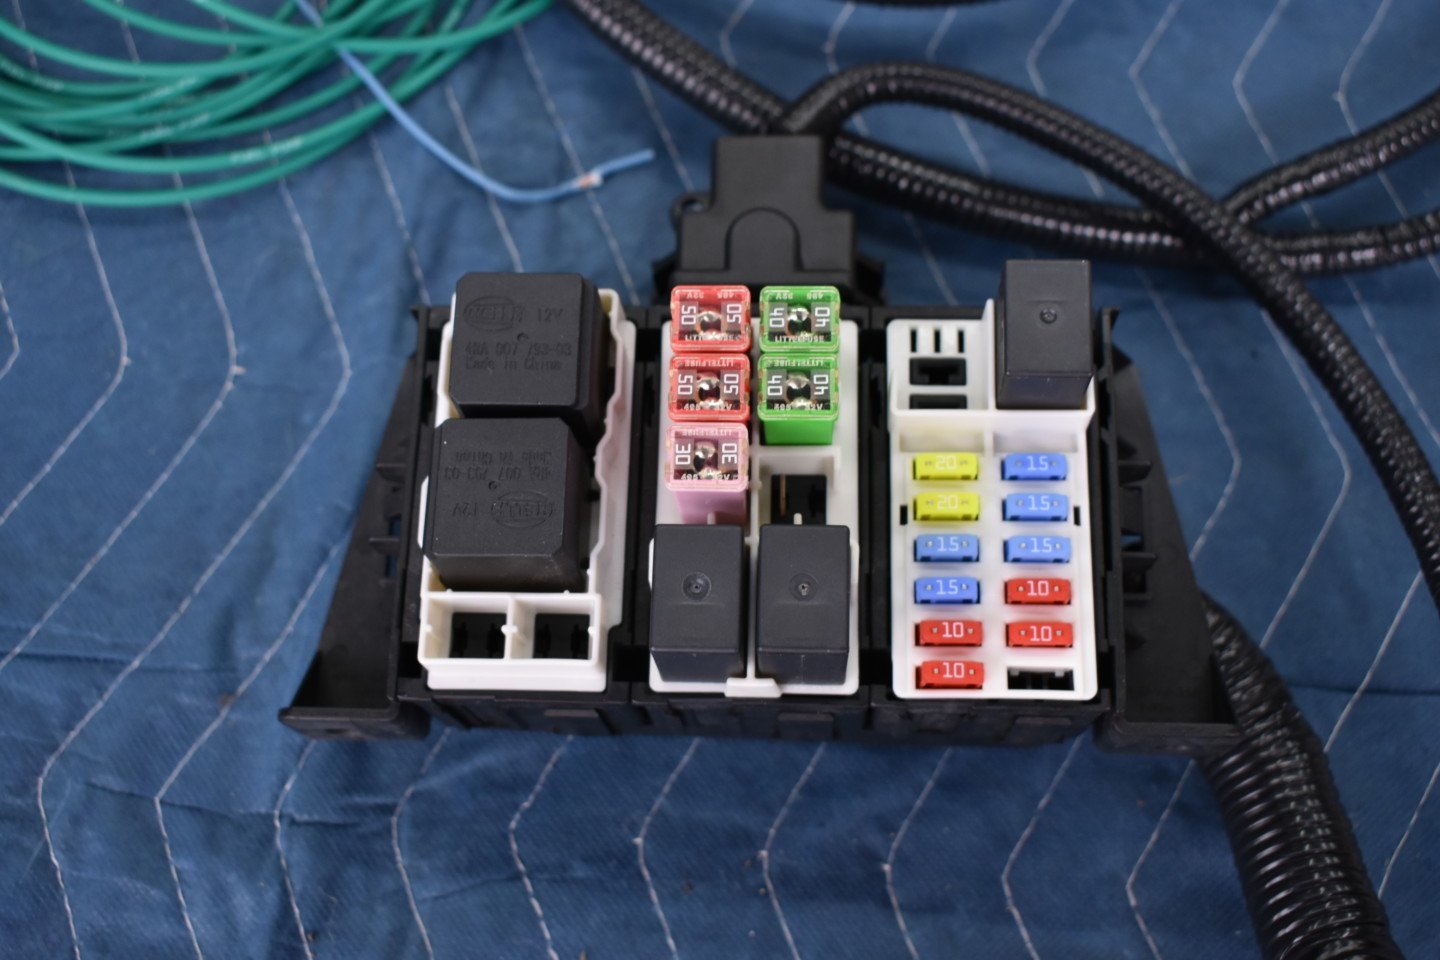
This is a look at the new fuse box to control the Coyote. No more cheesy 1960s and 1970s glass fuses anymore—these are all modern blade fuses.
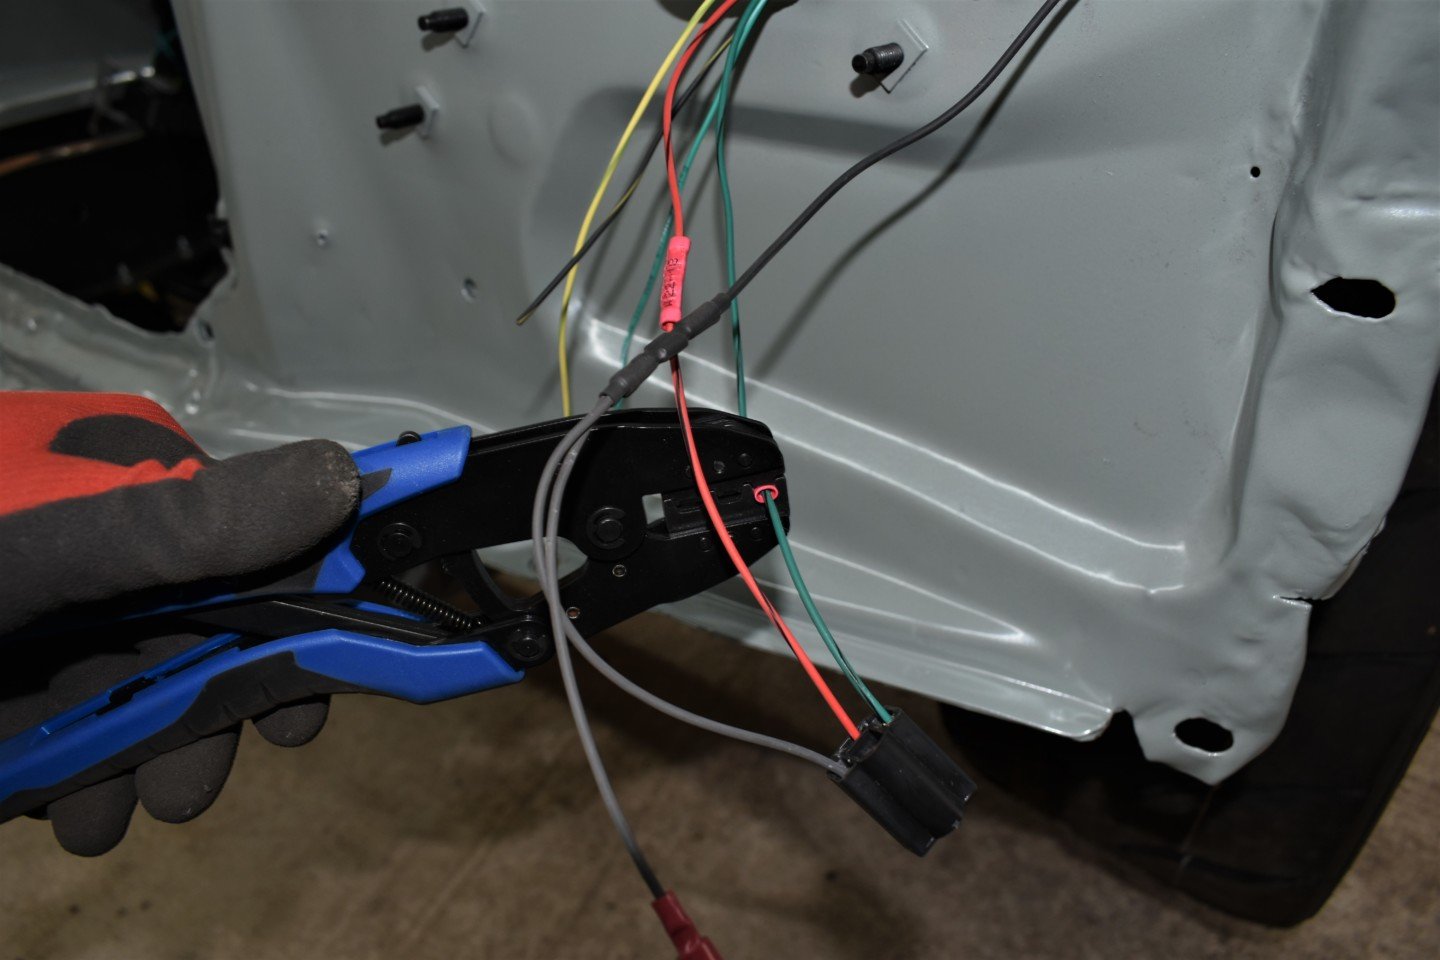
These are close-ups of two key under-dash wiring hookups.
We routed the wires and checked the lengths to make sure they will reach the accelerator pedal in the cab.
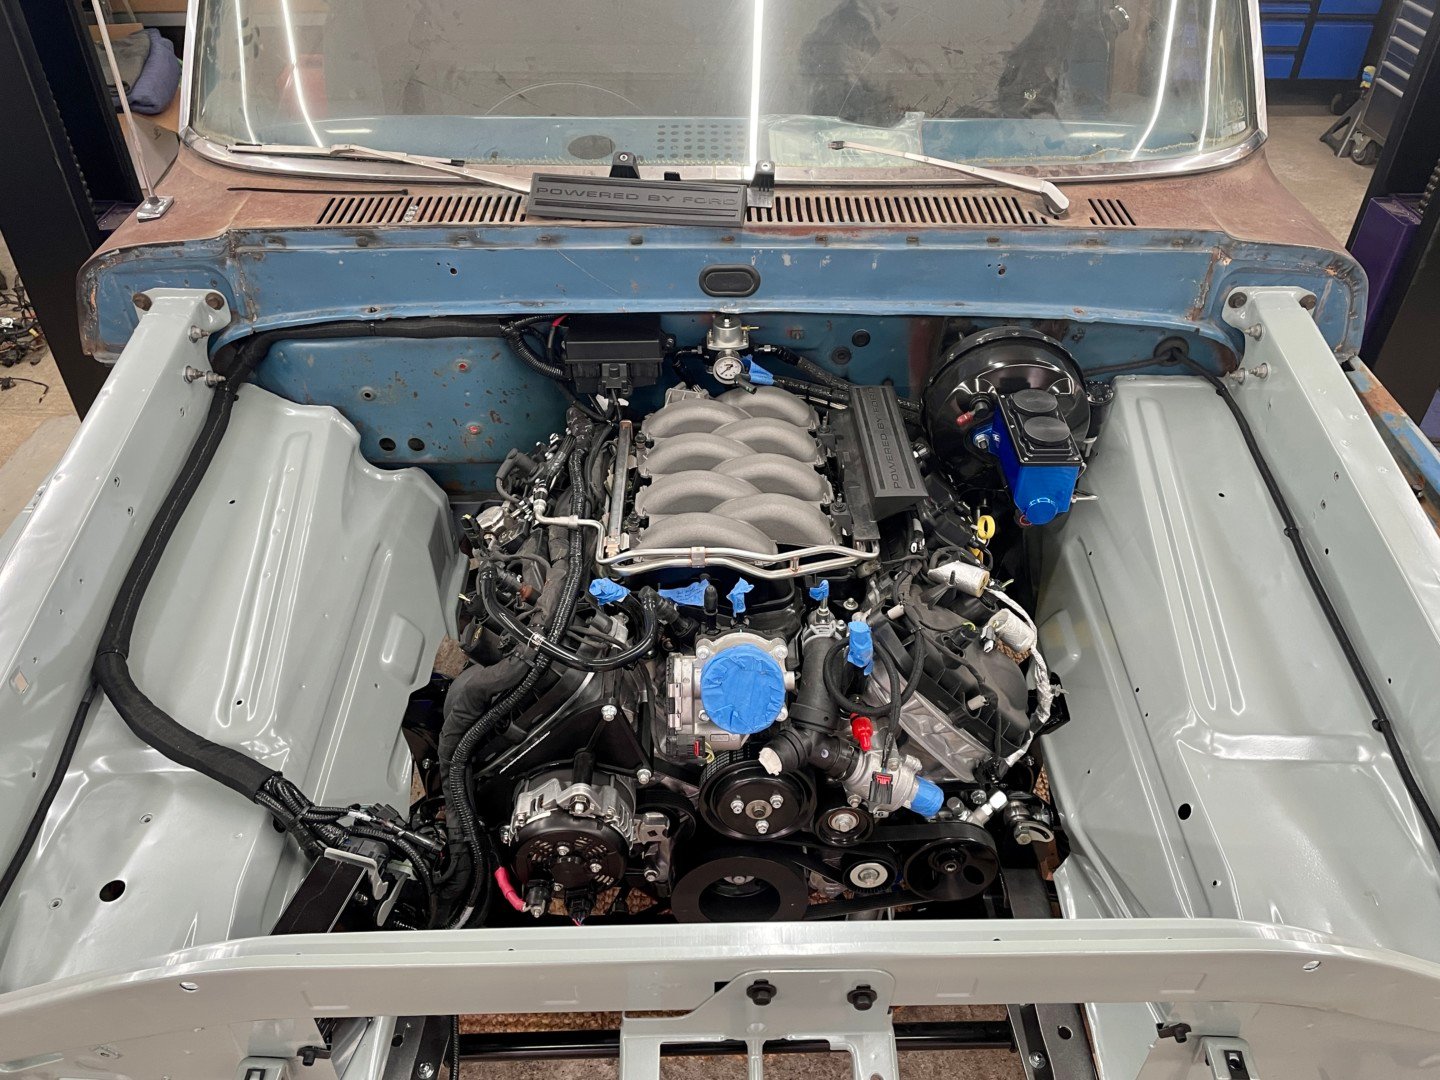
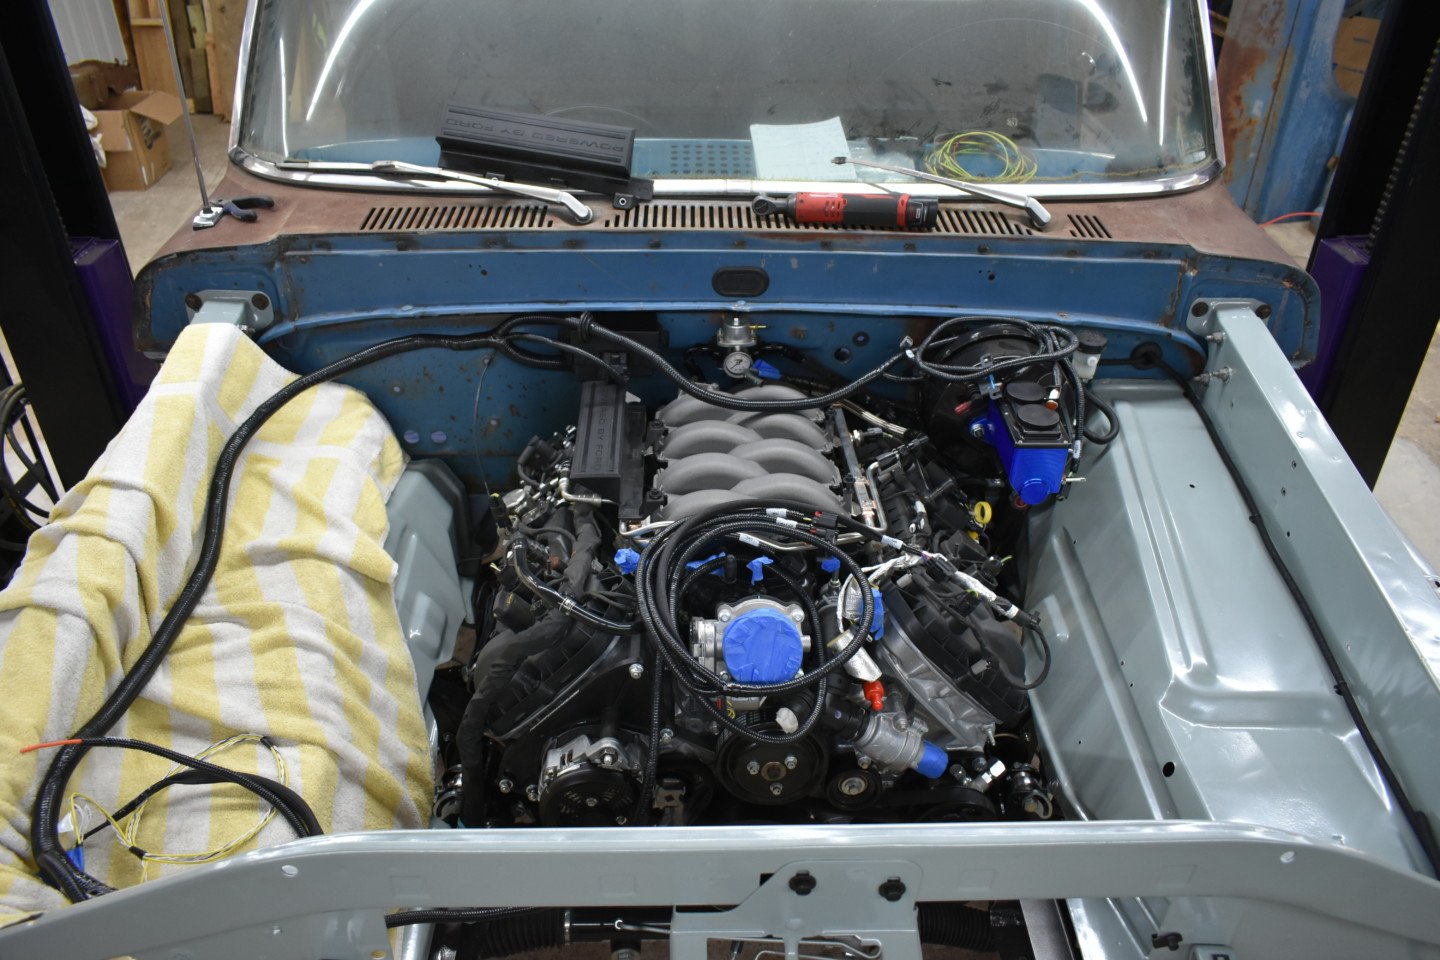
With everything installed, here's what our engine compartment looks like once the final harness routing was done.
This is the ATP custom '67-'72 F100 gauge cluster assembly built by Dakota Digital. These clusters will require you to use the '67 F100 metal gauge bezel or modify the later plastic bezel because the later model obstructs some of the cluster design. The goal for this design was to provide a period-correct look, with a much-improved aesthetic appeal. This first design run of clusters has a very vintage Mustang cluster design with arched numbers.
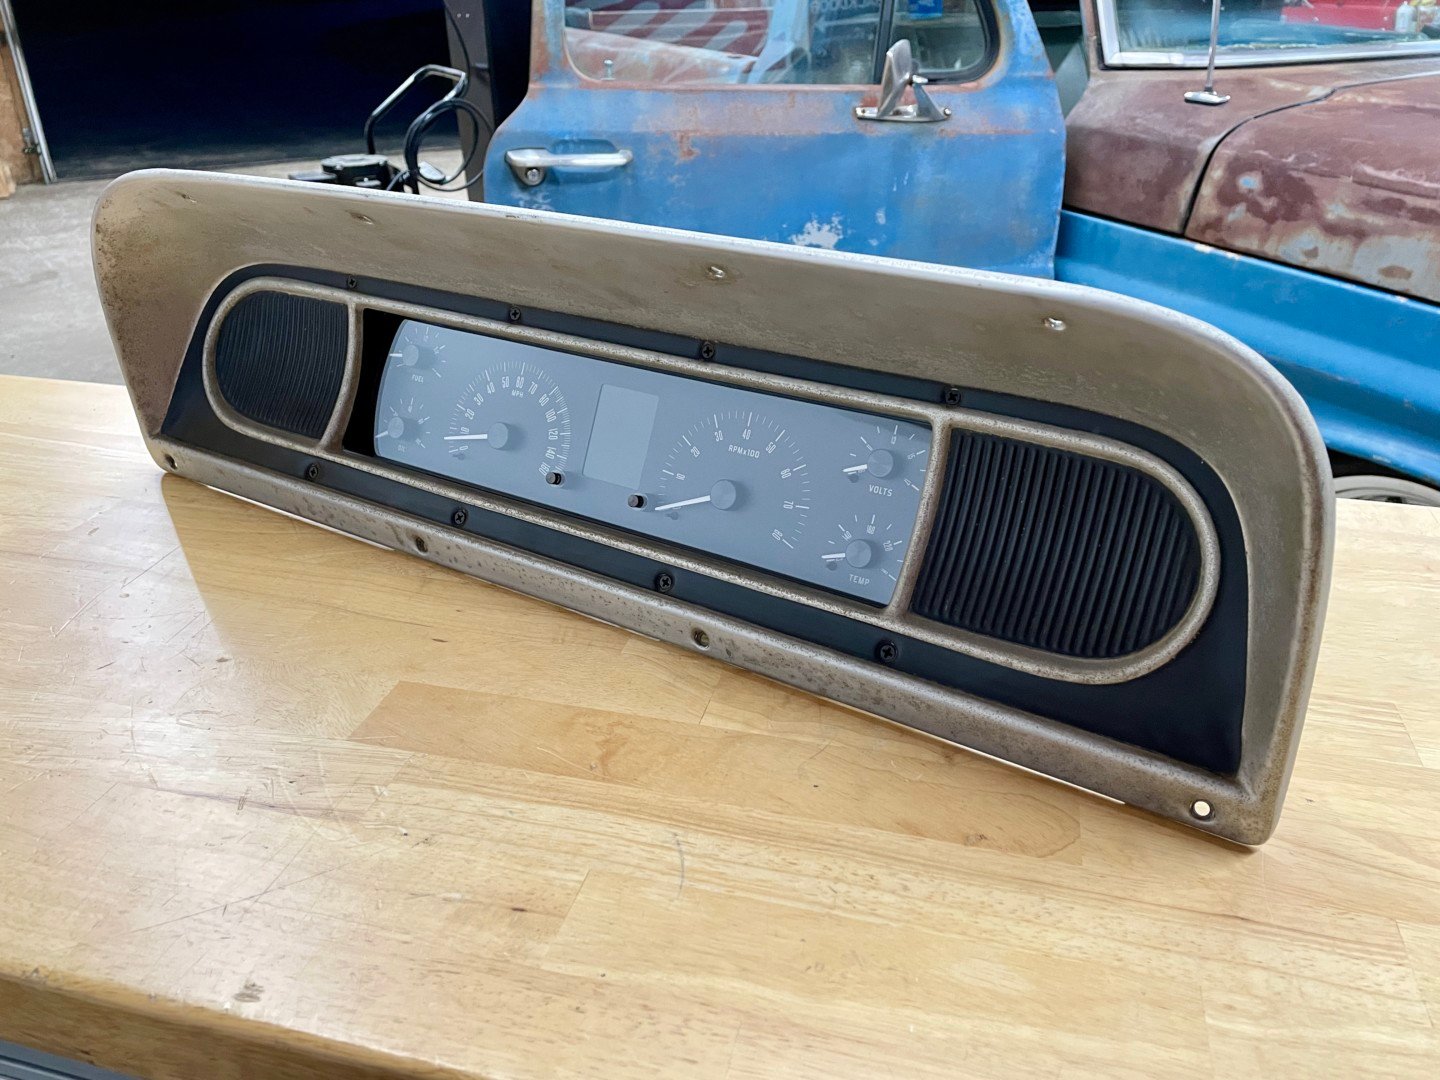
This is the gauges as installed in the stock dash gauge cluster.
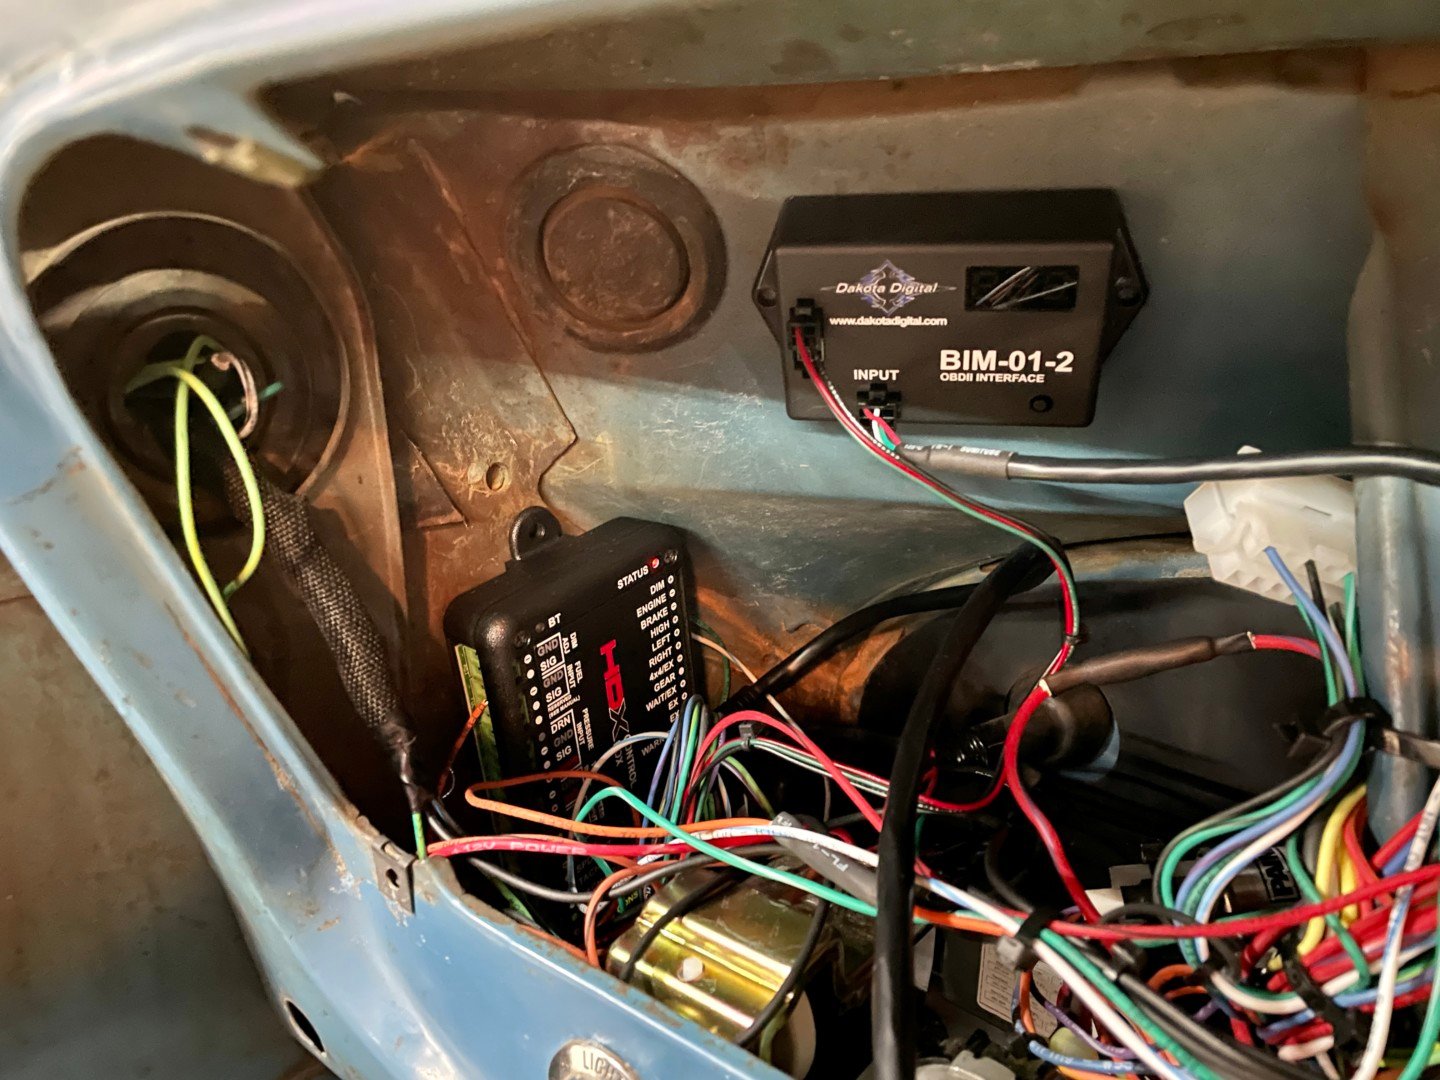
We mounted the OBD2 and Dakota controls behind the dash to shorten the wiring and make installation as straightforward as possible.
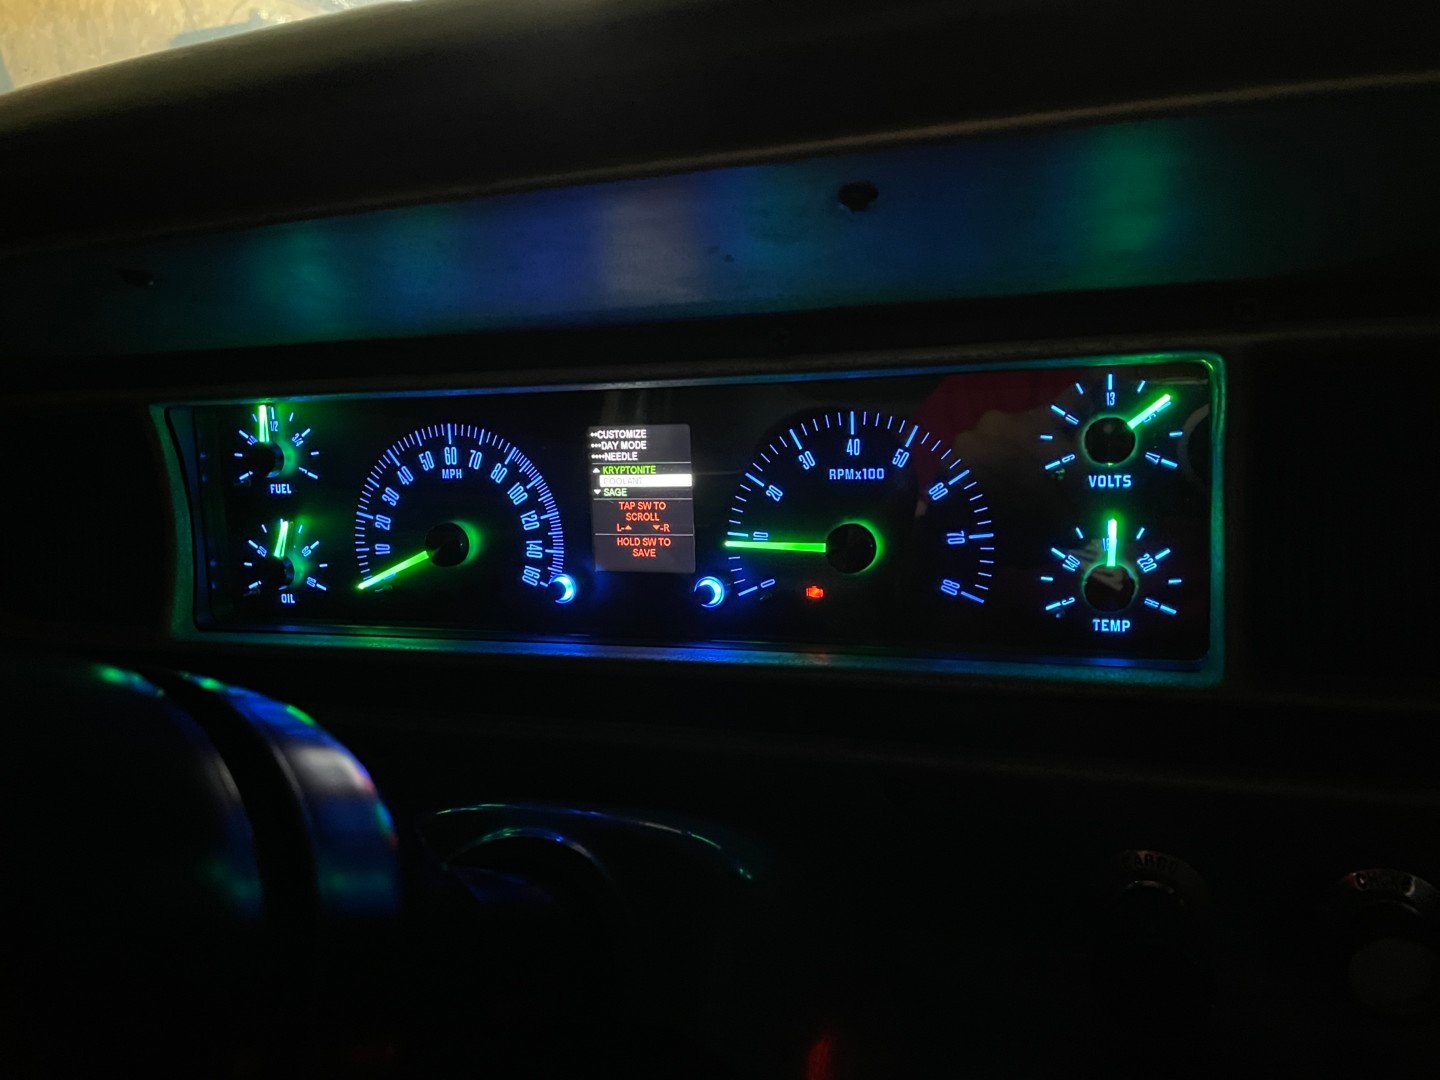
This shows the finished digital dash as installed. It's very striking, especially when compared to the old stock boring gauges.
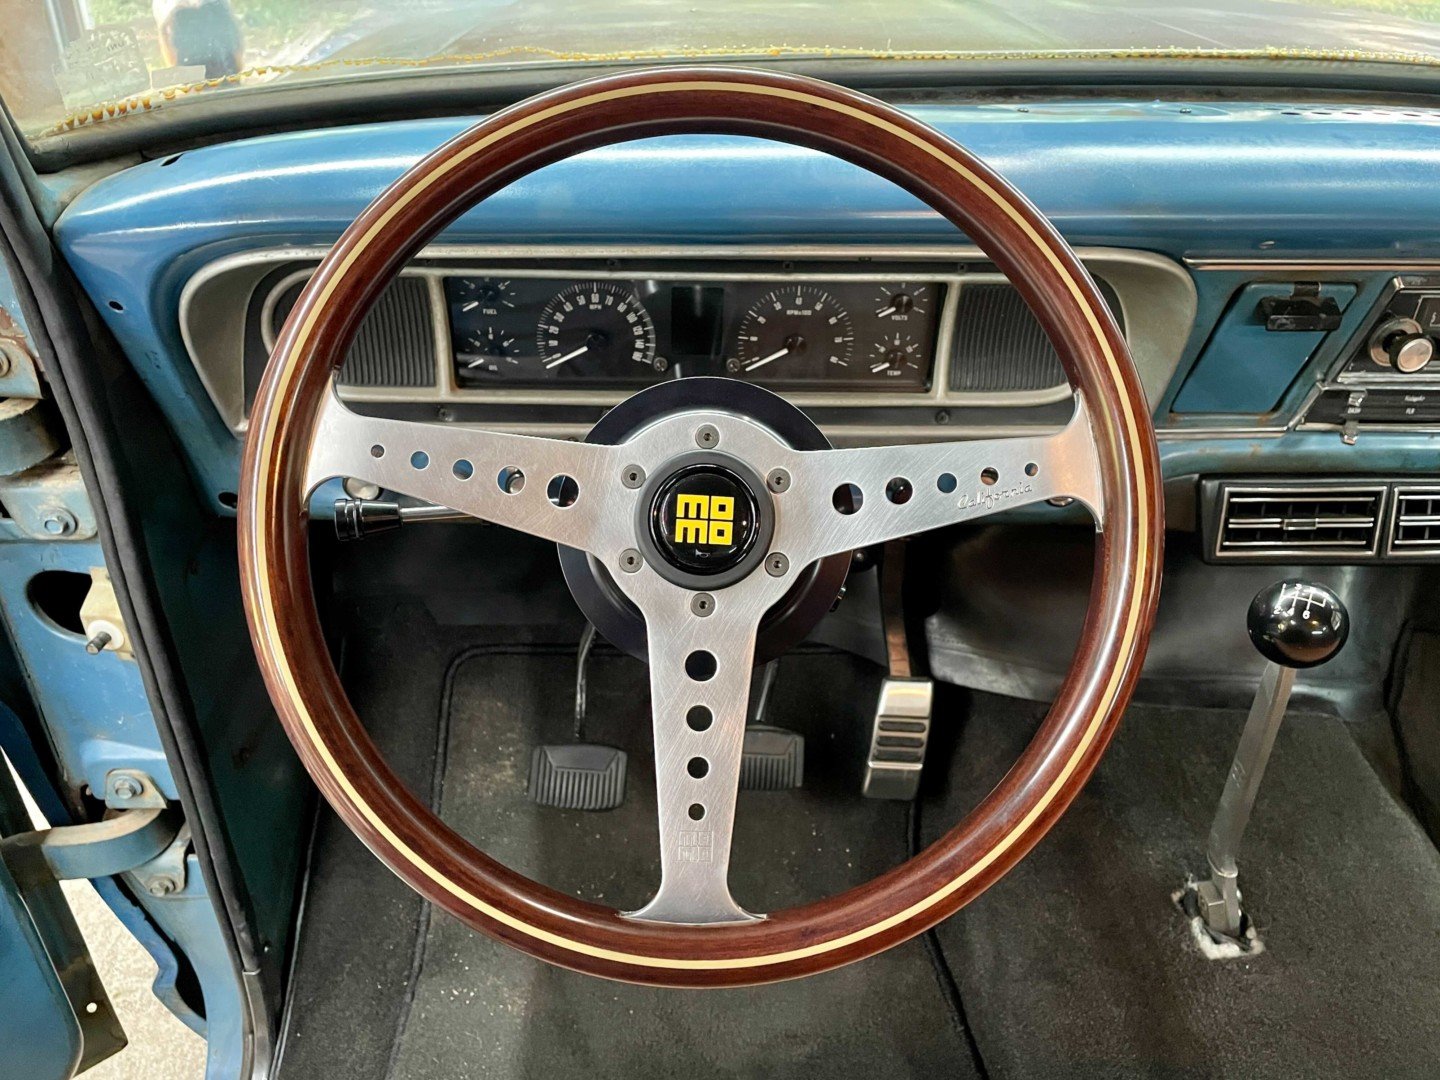
And here it is with the steering wheel on.

This is the wiring diagram that we came up with to energize the starter and fuel pump relay as well as the fuse box. It worked on the first crank! WHEW! The wiring is finally finished and the truck runs like a new car, and we're so thankful! Looking back, it took some time (on purpose) and was actually quite enjoyable when we made the mental decision to slow down and take our time. We highly recommend all-new wiring for your project vehicle: otherwise, you might get bitten by gremlins caused by inferior aged wiring. And nobody's got time for that!
Source: https://www.fordmuscle.com/tech-stories/other-tech/project-f-word-painless-wiring-in-a-classic-ford-f-100/
Posted by: kennethimesers.blogspot.com

Posting Komentar untuk "1972 Ford F100 Ignition Switch Wiring Diagram"